
- Details
- Category: raspiBackup
-
Also available:
")
- Hits: 7076
User Rating: 5 / 5

Invocationsyntax and -options
raspiBackup has to be invoked as user root or with sudo. The invocation syntax is
raspiBackup.sh Option1 Option2 Option3 ... backupdirectory
raspiBackup Option1 Option2 Option3 ... backupdirectory
- Details
- Category: raspiBackup
-
Also available:
- Hits: 47816
User Rating: 3 / 5

With raspiBackup you can create regular backups of your Raspberry. In addition you can restore a backup to any SD card. A new partition table is created on the target SD card and the backup data is restored on the partitions. If an external root filesystem was saved with raspiBackup this filesystem will also be restored to an external device.
Recently I got issues in github because restore failed. It's strictly recommended to restore your backup with the same OS the backup was created with. You're free to use another Linux release but this may the restore to fail because of different versions of the Linux tools which are usedto backup and restore the backup. In particular it's because of an incompatible change in sfdisk in Bullseye. Just use the OS the backup was created to restore the backup!
- Details
- Category: raspiBackup
-
Also available:
- Hits: 76581
User Rating: 4 / 5
Purpose of this page is to explain step by step how to use raspiBackup to create a backup imediately and how configure raspiBackup in 5 minutes to create a backup of your Raspberry on a regular base. This page describes for different platforms (Linux, Mac or Windows) how to restore the backup. After testing the backup and restore the next step should be to check which services have to be stopped before the backup starts. Finally cron (starting with Installer 0.4.8 systemd timer) should be configured to start raspiBackup on a regular base. Later on when you have some spare time read this page carefully to check which additional features of raspiBackup are useful for you and update the raspiBackup configuration accordingly. In any case it's strongly recommended to read the FAQ. The raspiBackup installer can be used to uninstall raspiBackup completely if for some reasons raspiBackup does not meet your requirements.
Note: In 5 minutes raspiBackup will be installed and configured if you have basic Linux knowledge. Otherwise you will need more time even the installer helps to create a basic raspiBackup configuration - unfortunately.
Read more: raspiBackup - Installation and configuration in 5 minutes
- Details
- Category: raspiBackup
-
Also available:
- Hits: 261866
User Rating: 4 / 5
raspiBackup helps to create backups of a running Raspberry with no shutdown or manual intervention which means your can save or clone your SD card during normal operation. An exported root partition will be saved too. Important services will be stopped just before starting the backup and are started again when the backup finished. Any device which can be mounted on Linux can be used as backupspace (USB disk, USB stick, nfs, samba, sshfs, ...). The backup image can be created with dd, tar or rsync using hardlinks. Restore is possible on Windows or Linux. Source Raspbian may have been installed on SD card only or the boot partition may be on SD card and the root partition on an external USB device like USB SSD or USB stick. Raspbian installed on an USB device only using USB boot mode is also supported
Read more: raspiBackup - Create regularly and unattended backup versions of your running Raspberries
- Details
- Category: raspiBackup
-
Also available:
- Hits: 9192
User Rating: 4 / 5
I finally picked myself up and created a video about raspiBackup and published it on Youtube. Topics in the video are
- Introduction of raspiBackup
- Visit of the most important websites for raspiBackup
- Visit of github which is used as a question- and issue handling tool for raspiBackup
- Live installation of raspiBackup with the menu driven installer
Slides used in the video can be downloaded here.
Read more: raspiBackup - Introduction and installation - Youtube Video in English
- Details
- Category: raspiBackup
-
Also available:
- Hits: 6445
raspiBackup has some helper scrips which are available on github for download.
1) raspiBackupWrapper.sh : Helps to do additional stuff before and after invocation of raspiBackup. The backuppartition is mounted already before starting raspiBackup and unmounted if it wasn't mounted when starting. Some basic bash scripting knowlege is required to customize the script for individual needs.
2) raspiBackupNfsWrapper.sh: Check if a NFS server is online and start raspiBackup. Don't start raspiBackup if the server is offline. This script can be used out of the box. Some constants regarding the nfs server have to be customized.
3) raspiBackupRestore2Image.sh: This script allows to convert a tar or rsync backup which was created in normal backup mode into a dd image. pishrink is used to make sure the image is as small as possible. kmbach suggested to create this script. No customization of the script required.
4) raspiImageMail.sh: THis script was created by raspiBackup user kmbach. He wanted to get an eMail at the end of raspiBackupRestore2Image.sh. eMail configuration is extracted from raspiBackup configuration file.
- Details
- Category: raspiBackup
-
Also available:
- Hits: 6698
User Rating: 5 / 5
From time to time there will be a new raspiBackup version be created which includes new features, enhancements and bug fixes. This version will go though an automated regession test which tests the main backup- and restorefunction. Next all new features, enhancements and bug fixes will be tested again manually even they were tested during development. Now the existing version will be published as beta. Everybody will get notified with a smiley :D in the eMail subject and a dedicated message wll inform about the beta availability. Now every raspibackup user can test the new beta version and to create a problem record if an issue is discovered. It's not possible to test all possible system environment configurations. Thus everybody who tests the beta will help to make sure there will no error been introduced in the new version.
Next page describes how to install the beta, how to uninstall the beta and revert to the previous version and how to create a problem record.
Read more: raspiBackup - How can I install and test the Beta version?
- Details
- Category: raspiBackup
-
Also available:
- Hits: 7216
raspiBackup is developed primarily on a Linux desktop. But finally raspiBackup is tested on a real Raspberry. There exist various raspibian images on disk which are restrored with raspiBackup on a SD card and/or USB stick and then the new or changed functionality of raspiBackup ist tested manually.
At some point in time a new version of raspiBackup has to be published. Initially I tested a lot of different variants by hand which takes a long time and reduces the number of my SD cards. Therefore I set up a Raspberry simulation environment on Linux. Now every new raspiBackup version is regression tested in the simulation environment. That's much faster and I don't have to buy new SD cards all the time any more.
On the following picture you can see a 3B Raspberry I use for tests together with various SD cards of different size and USB sticks.
- Details
- Category: raspiBackup
-
Also available:
- Hits: 9881
I just got a CM4 donated with 1GB main memory, 32GB eMMC and 128 GB NVMe. Thank you very much to the donator!
CM4 was already supported by raspiBackup but only running from a SD card, eMMC or USB boot. It's already possible to use NVMe when it's provided in an USB plug because it's exposed as a normal disk as /dev/sdx but there was no way to have NVMe plugged in in the PCI lane exposed as /dev/nvme. Now I fortunately was able to add this support to raspiBackup. This support is available now in release 0.6.8.
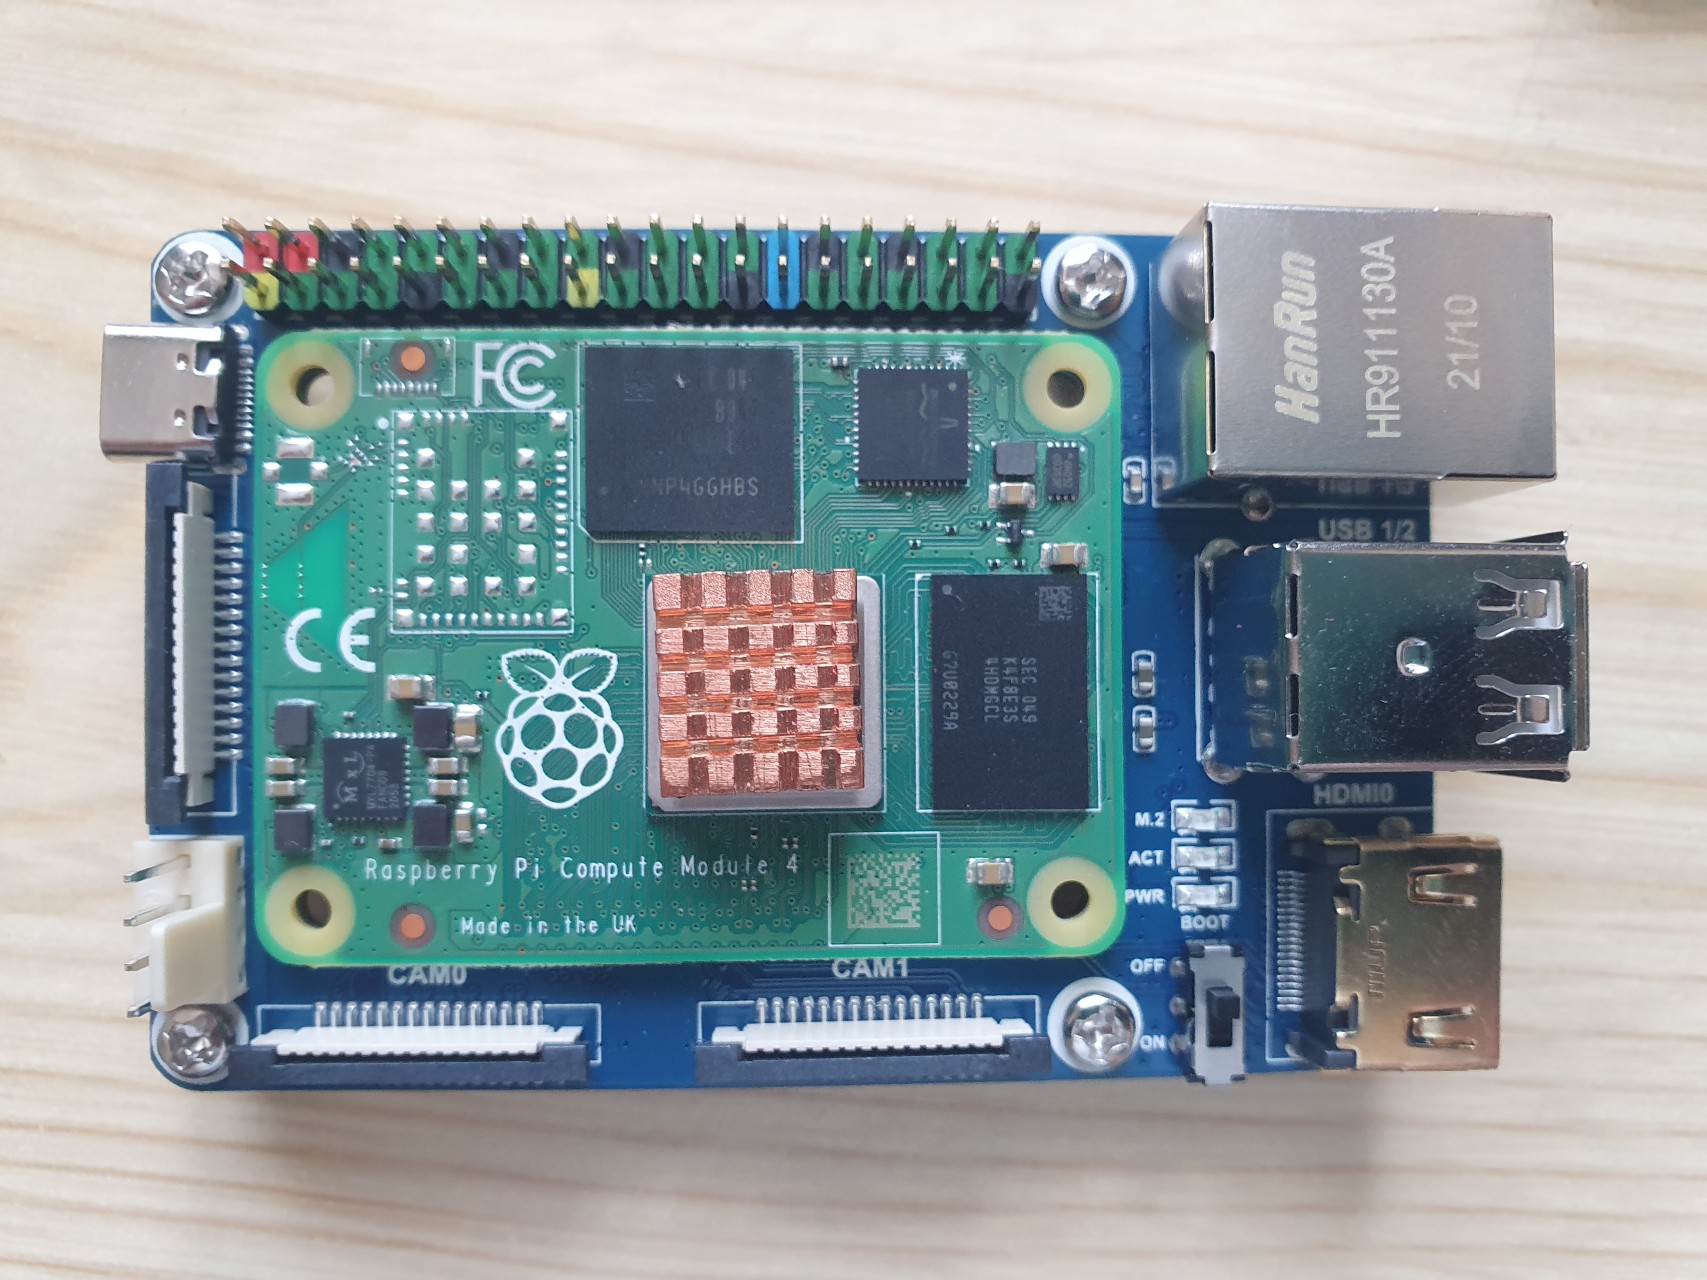
Read more: raspiBackup - Support for Raspberry Compute Module 4 and NVMe
- Details
- Category: raspiBackup
-
Also available:
- Hits: 12694
User Rating: 5 / 5
Any recognition of raspiBackup development- and maintenance effort and any support is greatly appreciated. There exist following donation alternatives:
1) Become a github sponsor for raspiBackup
2) Paypal: The eMail framp att linux-tips-and-tricks dott de is known by PayPal and everybody who owns a Paypal account can donate to this eMail.
3) Neither one: Just contact me with at the eMail above and we will find a solution. For example I already received multiple times donations in a good old postal letter :-)
- Details
- Category: raspiBackup
- Hits: 4281
If there is no specific question about raspiBackup to be asked on the respective website, general questions can be asked here. If there is a special page for the question, it will be referred to and
after the question was asked there again, answered there.
- Details
- Category: raspiBackup
-
Also available:
- Hits: 20207
In general using the installer is the fastest method to install raspiBackup. The installer also can be used to install raspiBackup with it's default configuration via the commandline. If you want to install raspiBackup manually execute the following steps:
Read more: raspiBackup - Manual installation and configuration
- Details
- Category: raspiBackup
-
Also available:
- Hits: 24107
User Rating: 5 / 5
Die latest list of raspiBackup releases with their new features and bugfixes you find here.
Subcategories
Page 5 of 6